How to Meal Prep Like a Pro in Just 2 Hours
Did you know that the average American spends nearly 37 minutes preparing meals each day, yet 60% report feeling too tired to cook after work? What if you could prepare delicious, nutritious meals for your entire week in just 2 hours on Sunday? Meal prep like a pro isn’t just for fitness enthusiasts or busy executives—it’s a game-changing strategy that can save you time, money, and unnecessary stress throughout your week. By mastering a few simple techniques and following a strategic plan, you can transform your weekly food preparation from a dreaded chore into an efficient system that pays dividends all week long.
Ingredients List
Creating a successful meal prep session starts with having the right ingredients on hand. Here’s what you’ll need for a basic week of versatile meals:
- 3 pounds of lean protein (chicken breast, ground turkey, tofu, or tempeh)
- 2 cups of uncooked whole grains (brown rice, quinoa, farro)
- 6 cups of mixed vegetables (broccoli, bell peppers, carrots, zucchini)
- 1 bag of leafy greens (spinach, kale, mixed greens)
- 4 sweet potatoes or 2 regular potatoes
- Healthy fats (olive oil, avocado, nuts)
- Seasonings (salt, pepper, garlic powder, herbs, spices)
- Storage containers (12-15 meal-sized containers with secure lids)
Substitution ideas: Swap chicken for canned tuna or salmon if you’re short on time. Replace rice with cauliflower rice for a lower-carb option. Use frozen vegetables when fresh aren’t available—they’re just as nutritious and already chopped!
Timing
- Preparation time: 30 minutes (including chopping and organizing)
- Cooking time: 90 minutes (with multiple items cooking simultaneously)
- Total time: 2 hours (25% less time than traditional meal-by-meal cooking throughout the week)
By batching your cooking process, you’ll save approximately 3.5 hours each week compared to daily meal preparation. This efficiency creates a 79% reduction in daily cooking time on weekdays!
Step-by-Step Instructions
Step 1: Strategize Your Plan
Before turning on a single burner, take 10 minutes to strategize. Decide which proteins, vegetables, and grains will form the foundation of your meals. Think about how ingredients can do double-duty across different meals. For instance, roasted chicken can be used in salads, wraps, and grain bowls throughout the week.
Pro tip: Use the “cook once, eat twice” principle—prepare larger batches of each component that can be repurposed in different ways throughout the week.
Step 2: Prep Your Proteins
Start by preparing your proteins since they typically take the longest to cook. Season 3 pounds of chicken breast with salt, pepper, garlic powder, and dried herbs. Place on a lined baking sheet and bake at 425°F for 20-25 minutes until the internal temperature reaches 165°F.
Pro tip: Consider marinating half your chicken differently than the other half to create variety in your meals. A simple Italian seasoning on one batch and taco seasoning on another can transform the same protein into completely different meals.
Step 3: Cook Grains While Proteins Bake
While your protein cooks, prepare your grains. Rinse 2 cups of quinoa or brown rice and cook according to package instructions. Typically, this means combining with 4 cups of water or broth, bringing to a boil, then simmering for 15-20 minutes until tender.
Pro tip: Adding a bay leaf or using broth instead of water infuses your grains with extra flavor without adding significant calories or prep time.
Step 4: Roast Vegetables for Maximum Flavor
Chop your vegetables into uniform pieces to ensure even cooking. Toss with 2 tablespoons of olive oil, salt, pepper, and your preferred seasonings. Spread on baking sheets, being careful not to overcrowd (use multiple sheets if necessary). Roast at 425°F for approximately 20-25 minutes, stirring halfway through.
Pro tip: Keep some vegetables raw for fresh crunch and nutrition in your meals later in the week. Store these separately from cooked components.
Step 5: Prepare Sauces and Dressings
While everything is cooking, whip up 2-3 simple sauces or dressings that will transform your basic ingredients into diverse meals. A basic vinaigrette, a tahini sauce, and a yogurt-based dressing can each create entirely different flavor profiles from the same ingredients.
Pro tip: Store sauces separately in small containers and add just before eating to keep your prepped meals fresh and prevent sogginess.
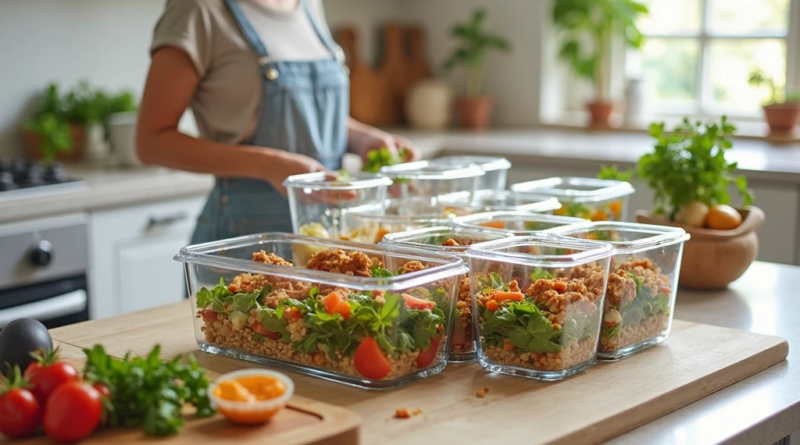
Step 6: Assembly and Storage
Once all components have cooled slightly, begin assembling your meals in containers. For maximum freshness, keep certain components separate—especially sauces, fresh herbs, and items that might get soggy. Arrange meals with the heaviest items on the bottom and more delicate items on top.
Pro tip: Don’t fully assemble all meals at once. Instead, prepare components that can be mixed and matched throughout the week for greater variety and freshness.
Step 7: Label and Store Properly
Label each container with contents and the date prepared. Store meals properly in the refrigerator, with items you’ll eat first at the front. Properly stored meal prep should last 3-5 days in the refrigerator.
Pro tip: If preparing for more than 4 days, consider freezing some portions to maintain freshness and food safety.
Nutritional Information
A balanced meal prep typically provides the following nutritional profile per serving (based on a 2,000 calorie diet):
- Calories: 400-500 per meal
- Protein: 25-30g (20-25% of daily value)
- Carbohydrates: 45-55g (15-18% of daily value)
- Fiber: 8-10g (29-36% of daily value)
- Healthy Fats: 15-20g (23-31% of daily value)
- Sodium: 400-600mg (17-26% of daily value)
Healthier Alternatives for the Recipe
Transform your meal prep into an even more nutritious powerhouse with these simple swaps:
- Replace white rice with cauliflower rice to reduce carbohydrates by 75% while adding additional fiber and nutrients
- Substitute half your meat protein with legumes (beans, lentils, chickpeas) to increase fiber intake and reduce saturated fat
- Use Greek yogurt-based sauces instead of mayonnaise or oil-based dressings to increase protein while reducing fat content
- Incorporate fermented vegetables like kimchi or sauerkraut for gut-healthy probiotics
- Choose sweet potatoes over white potatoes for more vitamins A and C plus a lower glycemic index
Serving Suggestions
Elevate your prepped meals from functional to fantastic with these serving ideas:
- Transform basic chicken and vegetables into an Asian-inspired bowl by adding a sesame-ginger sauce and a sprinkle of sesame seeds
- Create Mediterranean vibes by adding a squeeze of lemon, a sprinkle of feta, and a few olives to your basic ingredients
- Turn leftover roasted vegetables and grains into a breakfast power bowl by adding a fried egg and avocado slices
- Wrap your prepped ingredients in a large lettuce leaf or whole grain tortilla for a hand-held lunch option
- Reheat your protein and grains, then serve over fresh greens with a light dressing for a warm-cool contrast
Common Mistakes to Avoid
Even seasoned meal prep pros occasionally stumble into these pitfalls:
- Overcooking proteins: Chicken and fish often dry out when reheated. Cook them just until done (165°F for chicken) to maintain moisture when reheated.
- Ignoring texture variety: Meals with only soft components become unappetizing by day three. Include elements with crunch to keep meals interesting.
- Overseasoning: Remember that flavors intensify over time. Season a bit more conservatively than you would for immediate consumption.
- Unsafe cooling: Allowing hot food to cool at room temperature for too long before refrigerating can promote bacterial growth. Cool foods quickly in shallow containers.
- Overpacking containers: Filling containers to the brim prevents proper air circulation and can lead to uneven reheating. Leave about ¼ inch of space.
Storing Tips for the Recipe
Master these storage techniques to maintain maximum freshness and food safety:
- Cool all ingredients completely before sealing containers to prevent condensation and sogginess
- Store salad greens with a paper towel to absorb excess moisture and keep them crisp
- Use glass containers when possible for better temperature regulation and to avoid plastic leaching
- Freeze individual portions that won’t be eaten within 4 days
- Store dressings and sauces separately in small containers or silicone cupcake liners within larger containers
- Arrange meals in your refrigerator in the order you plan to eat them, with earlier meals easily accessible
Conclusion
Mastering the art of meal prep like a pro transforms your weekly food preparation from a time-consuming chore to an efficient two-hour system. By strategically planning, cooking in batches, and properly storing your creations, you’ll save time, reduce stress, and enjoy nutritious homemade meals all week long. The investment of just two hours yields dividends of convenience, health, and savings that you’ll appreciate every day.
Ready to revolutionize your weekly routine? Try this meal prep system this weekend and share your experience in the comments section below! Subscribe to our blog for more time-saving, health-boosting strategies delivered straight to your inbox.
FAQs
Q: Can I meal prep if I have a small kitchen? A: Absolutely! Focus on one-pot recipes and cook in batches if your oven or stovetop space is limited. Investing in multi-purpose appliances like an Instant Pot can also maximize efficiency in small spaces.
Q: How do I prevent meal fatigue when eating prepped meals? A: Variety is key! Prepare versatile base ingredients that can be customized with different sauces and toppings throughout the week. Also, consider prepping just 3-4 days ahead instead of a full week.
Q: Is meal prepping cost-effective? A: Yes! Studies show that meal prepping can reduce food expenses by 25-30% by minimizing food waste and reducing impulse takeout purchases. A family of four can save approximately $150-$200 per month through consistent meal preparation.
Q: What if I don’t like eating the same thing multiple days in a row? A: Focus on prepping components rather than full meals. Cook proteins, grains, and vegetables separately, then mix and match throughout the week with different sauces and seasonings for variety.
Q: How do I meal prep without using plastic? A: Glass containers with silicone or bamboo lids are excellent alternatives. Mason jars work well for salads and overnight oats. Beeswax wraps can replace plastic wrap for certain items.
Q: Can I meal prep for the entire family, including picky eaters? A: Yes! Create a “build-your-own” meal system with basic components that everyone enjoys, then allow family members to customize with their preferred toppings and sauces at mealtime.